

Neovim basics for Ruby and Rails development with LSP, NERDTree, Telescope and more.


I tried a lot of times use just VSCode for working, but i have an inexplicable passion about Vim and Neovim and i decided once more to use only Neovim to write code for 2 or 3 months. Well, now I'm going to share my configurations, plugins, some prints screens and my experience during this time using only Neovim.
Where does this unexplained passion come from?
Well, i don't know how to explain, but i feel more productive and excited about writing code when i'm using Vim/Neovim. I don't touch my mouse for hours and it's like my attention gets more caught up in the code when using Vim. Similar to something I feel when I use Mac or Linux instead of Windows, just personal preference.
Content of this post
- Neovim Installation
- Basic configurations
- Default Shortcuts
- Leader key and key mappings
- Installing Plugins
- NERDTree
- LSP
- Telescope
- Other plugins
Neovim Installation
In my case I'm using MacOS, but nowadays is not that difficult to install it in Linux or Windows using WSL. Using Homebrew is very easy to install Neovim:
brew install neovim
# When the installation finishes, you should be able to run:
nvim -v
...and see a message like this:
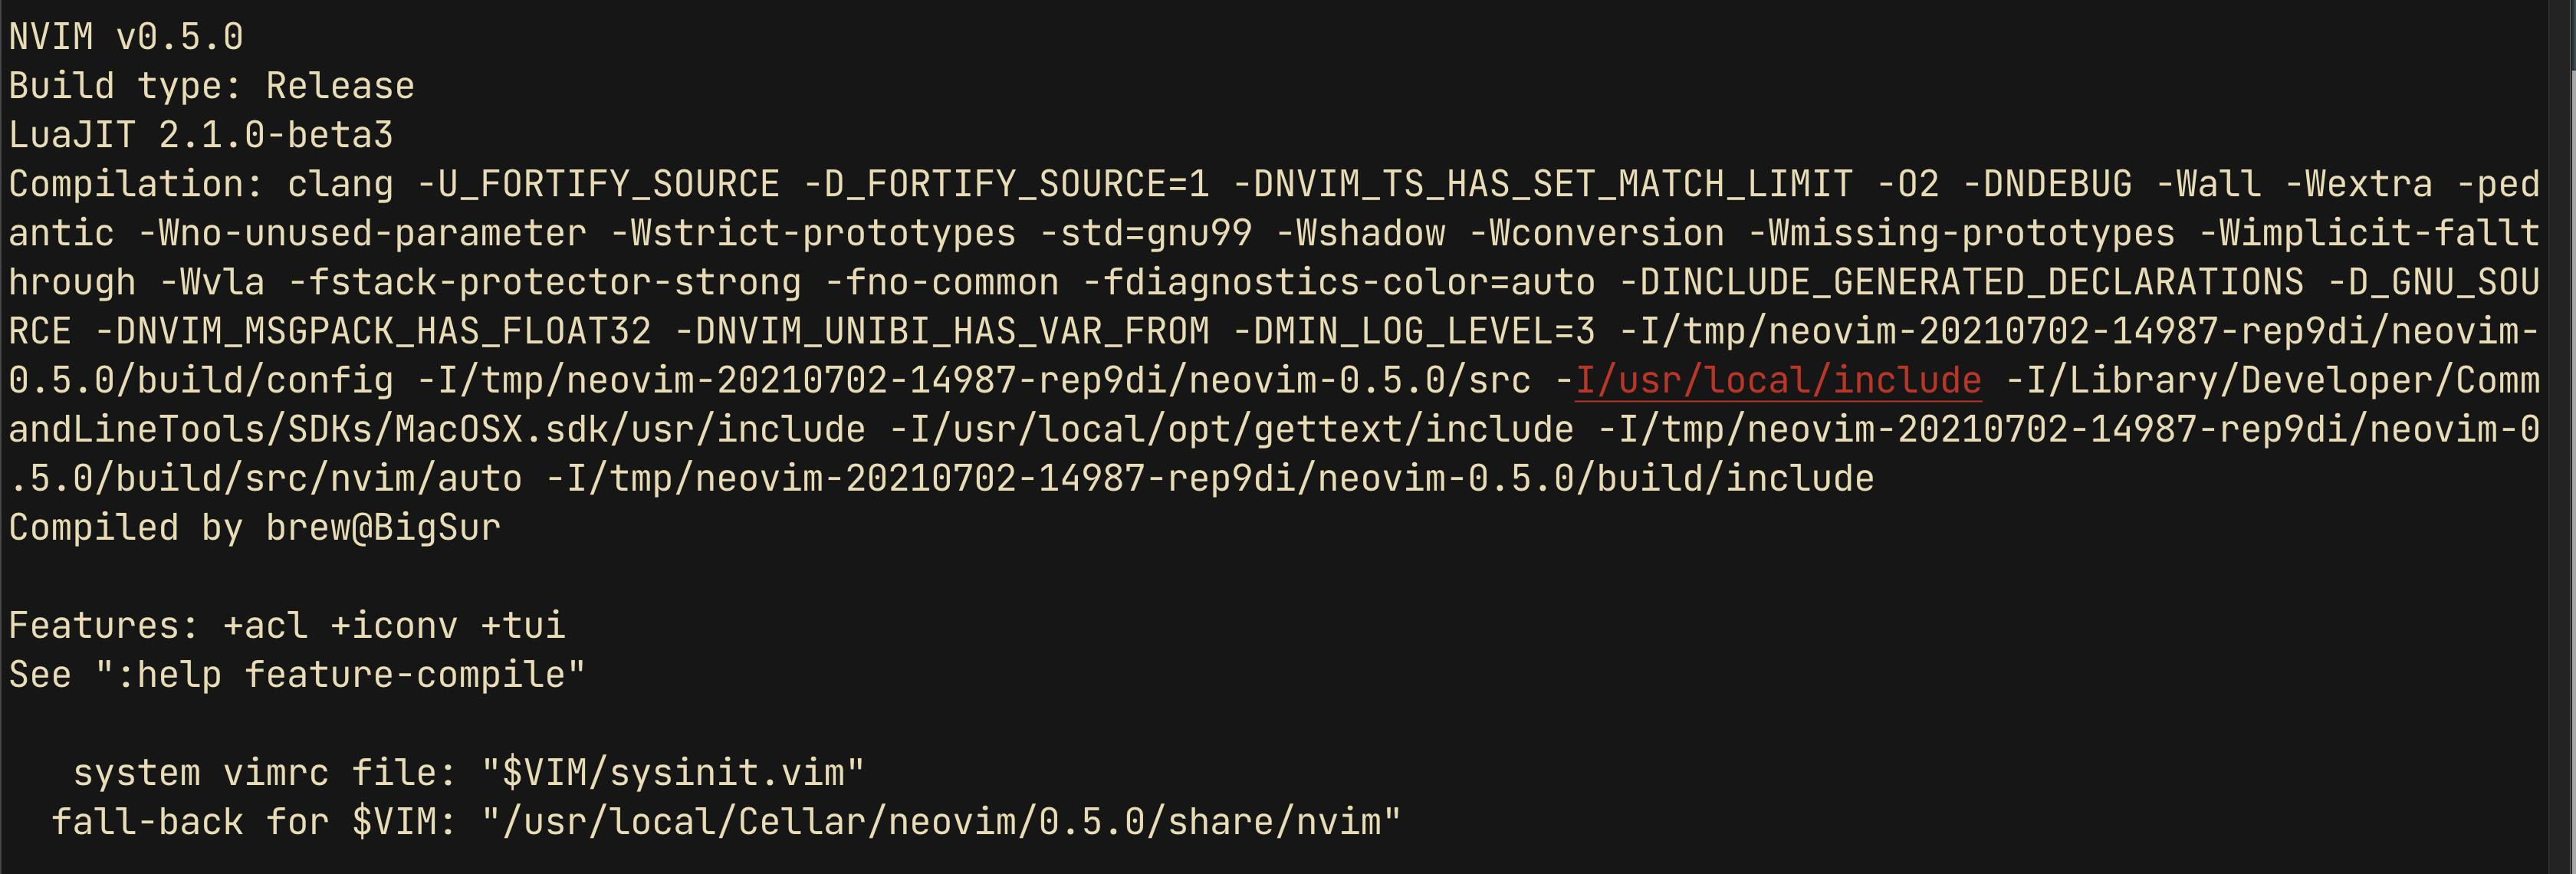
That's it! We already have Neovim avaiable and you can open it using the command nvim inside a folder in your terminal (we'll see it latter). In this case we are using Neovim in version 0.5.0, the last stable version. See more here.
Basic configurations
To start customizing your Neovim, we need to create a folder and an initial file to define our configurations:
# Creating a new folder to hold our configuration files
# this is the default folder where Neovim searches it's
# configuration files
mkdir ~/.config/nvim
# Enter this folder
cd ~/.config/nvim
# Create our initial file where it all starts
touch init.vim
# Enter the nvim folder
cd nvim
# Now open the init.vim using Neovim
nvim init.vim
Before anything, you should know that Vim and Neovim have different modes to edit the content of a file. The most common are INSERT and VISUAL modes. As soon as you enter the file you can type v and see the mode changing in the lower left corner of the Neovim to VISUAL, after that type ESC to exit VISUAL mode, type i to enter INSERT mode and press ESC again to exit INSERT mode, that's a simple concept. Basically using the VISUAL mode you select letters, words of entire peaces of code and INSERT mode you can edit your code.
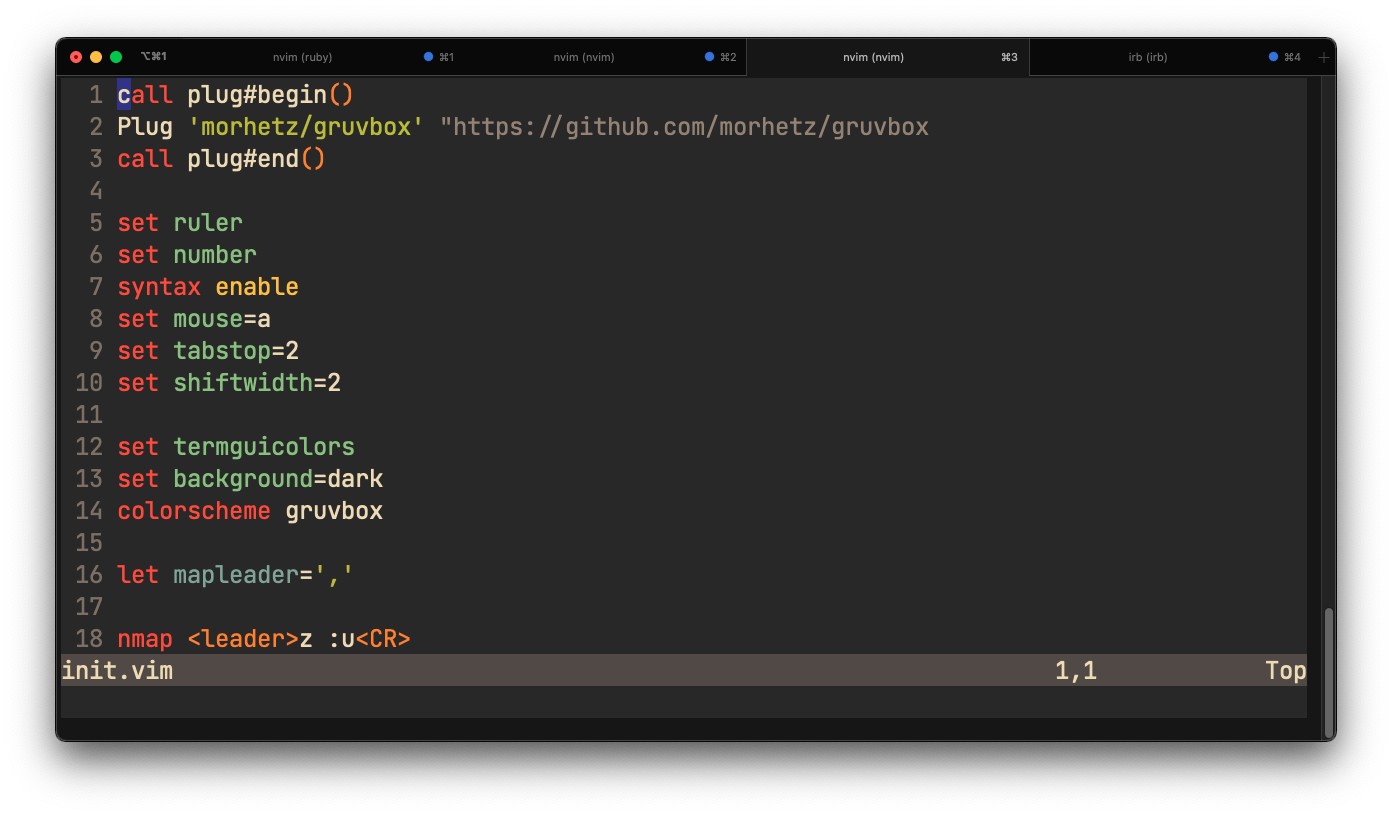
Now using the INSERT mode, let's define our first configurations to our Neovim:
" Enable Ruler
set ru
" Show the line number
set number
" Enable Syntax Highlighting
syntax enable
" Enable using the mouse to click or select some peace of code
set mouse=a
" Set the Tab to 2 spaces
set tabstop=2
set shiftwidth=2
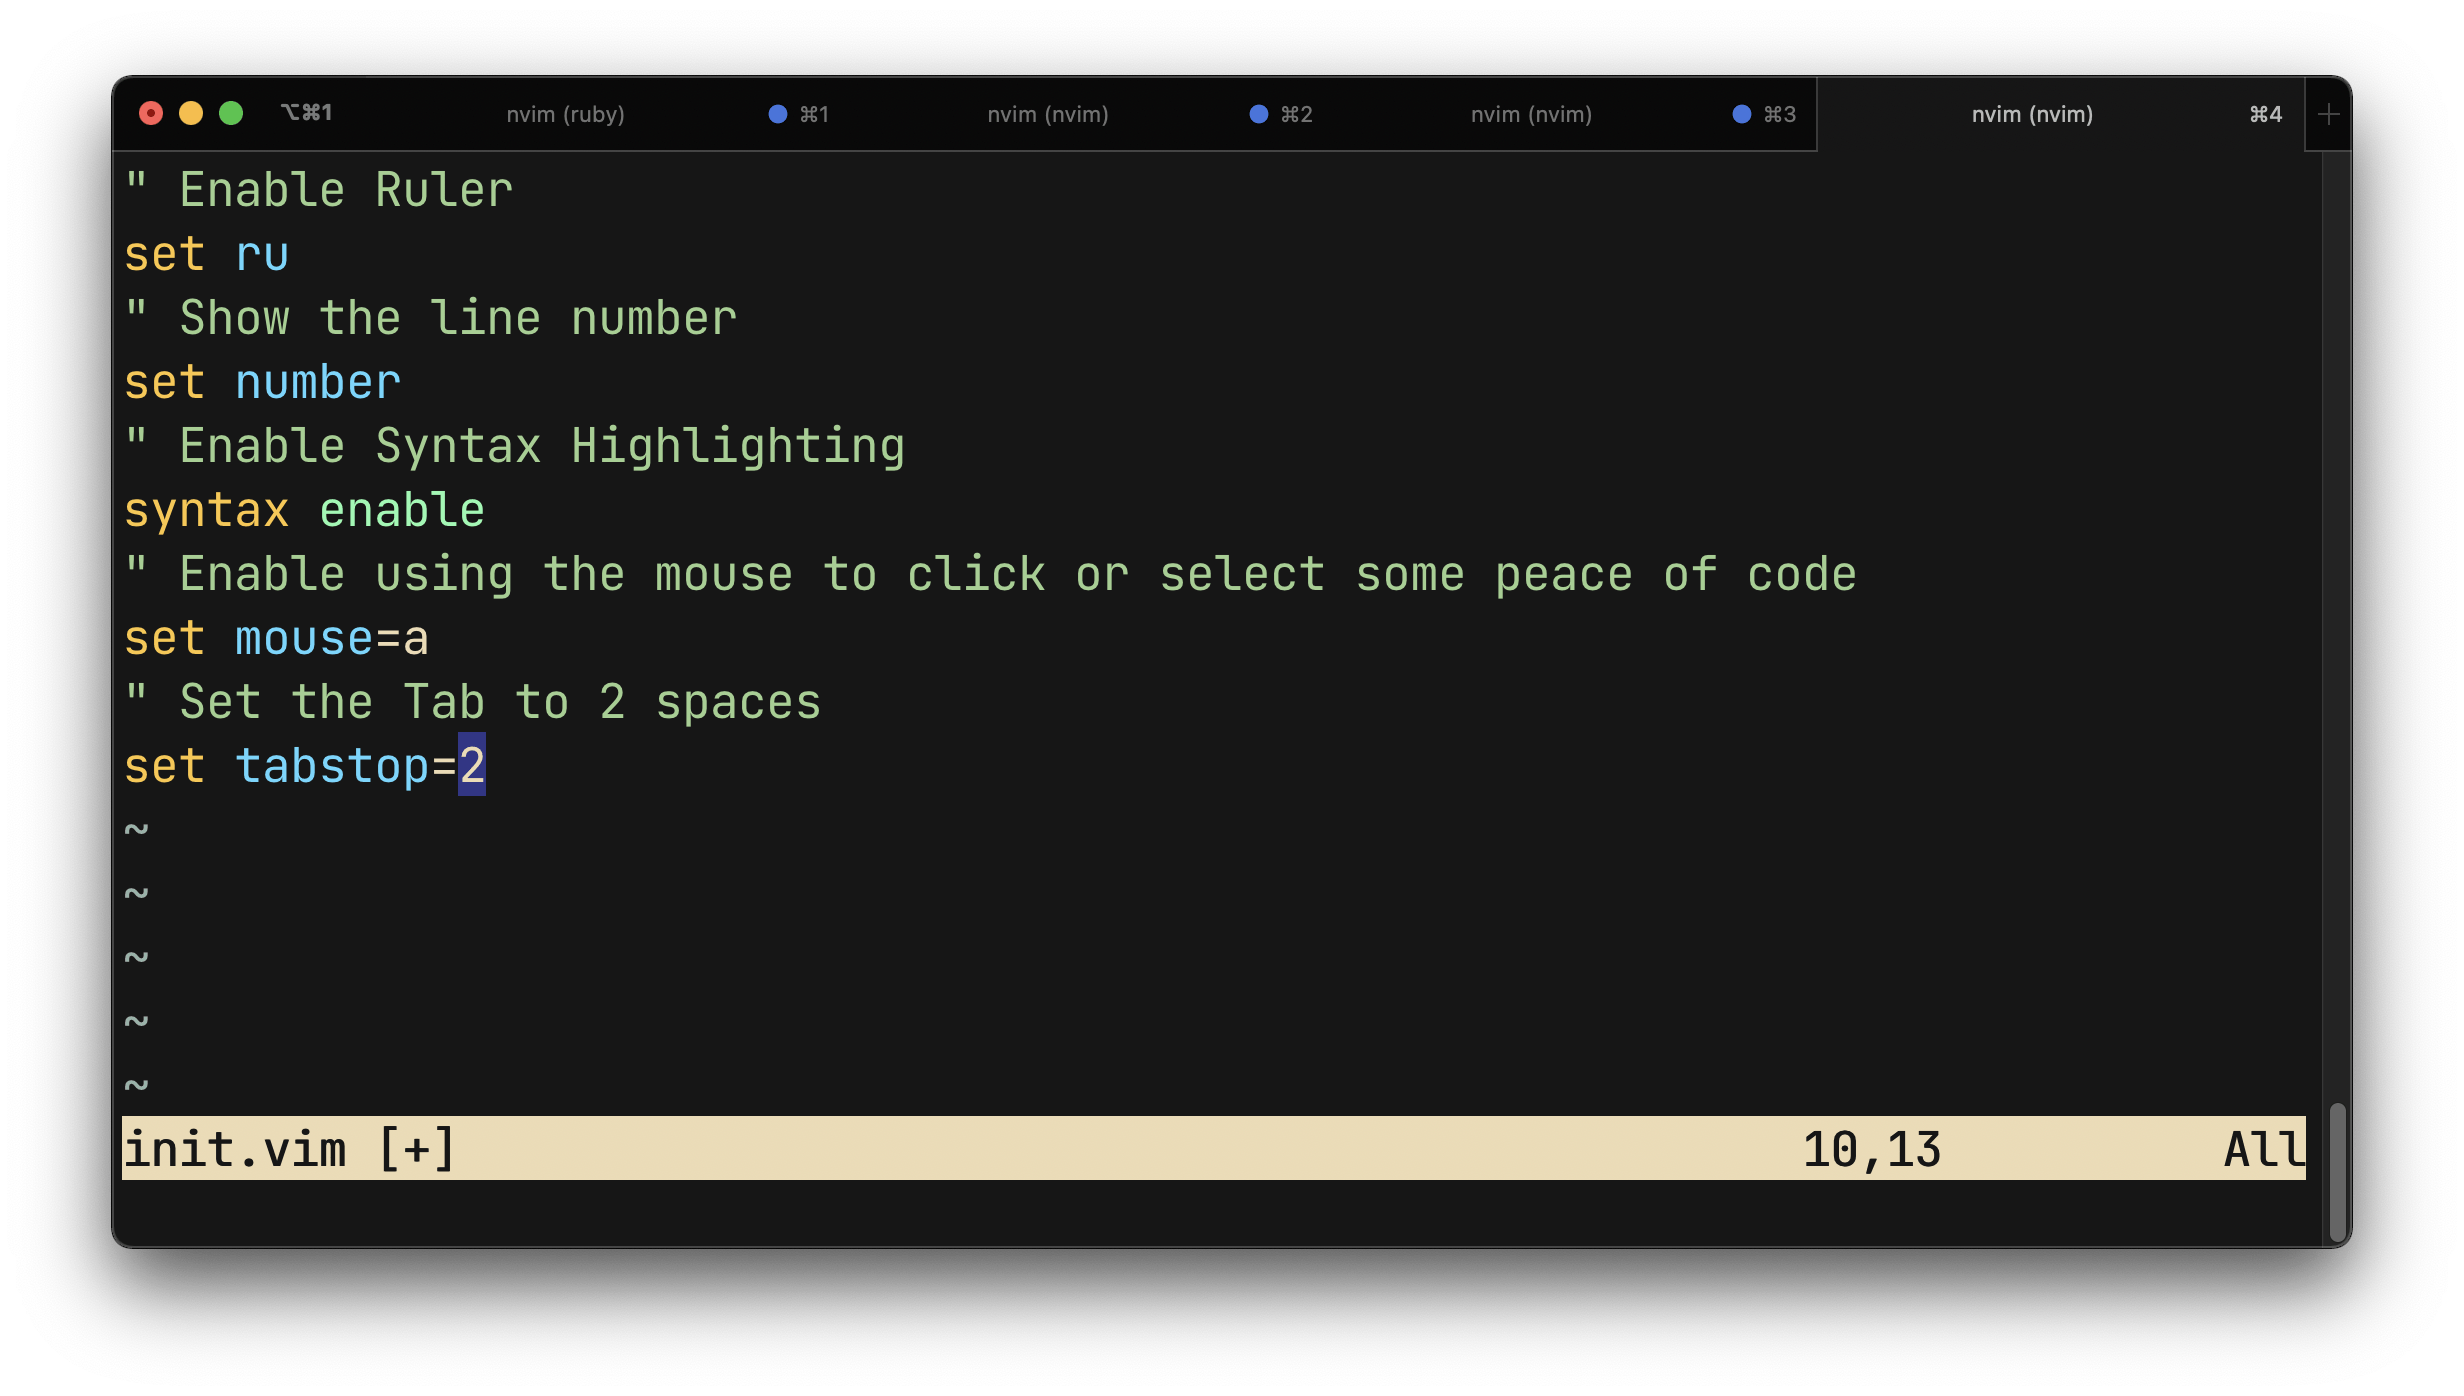
Now, quit Neovim to reload the init.vim file and see the difference. To quit Neovim press ESC and :q. You always will see the commands in the lower left corner of the Neovim, remember this.
Before
After
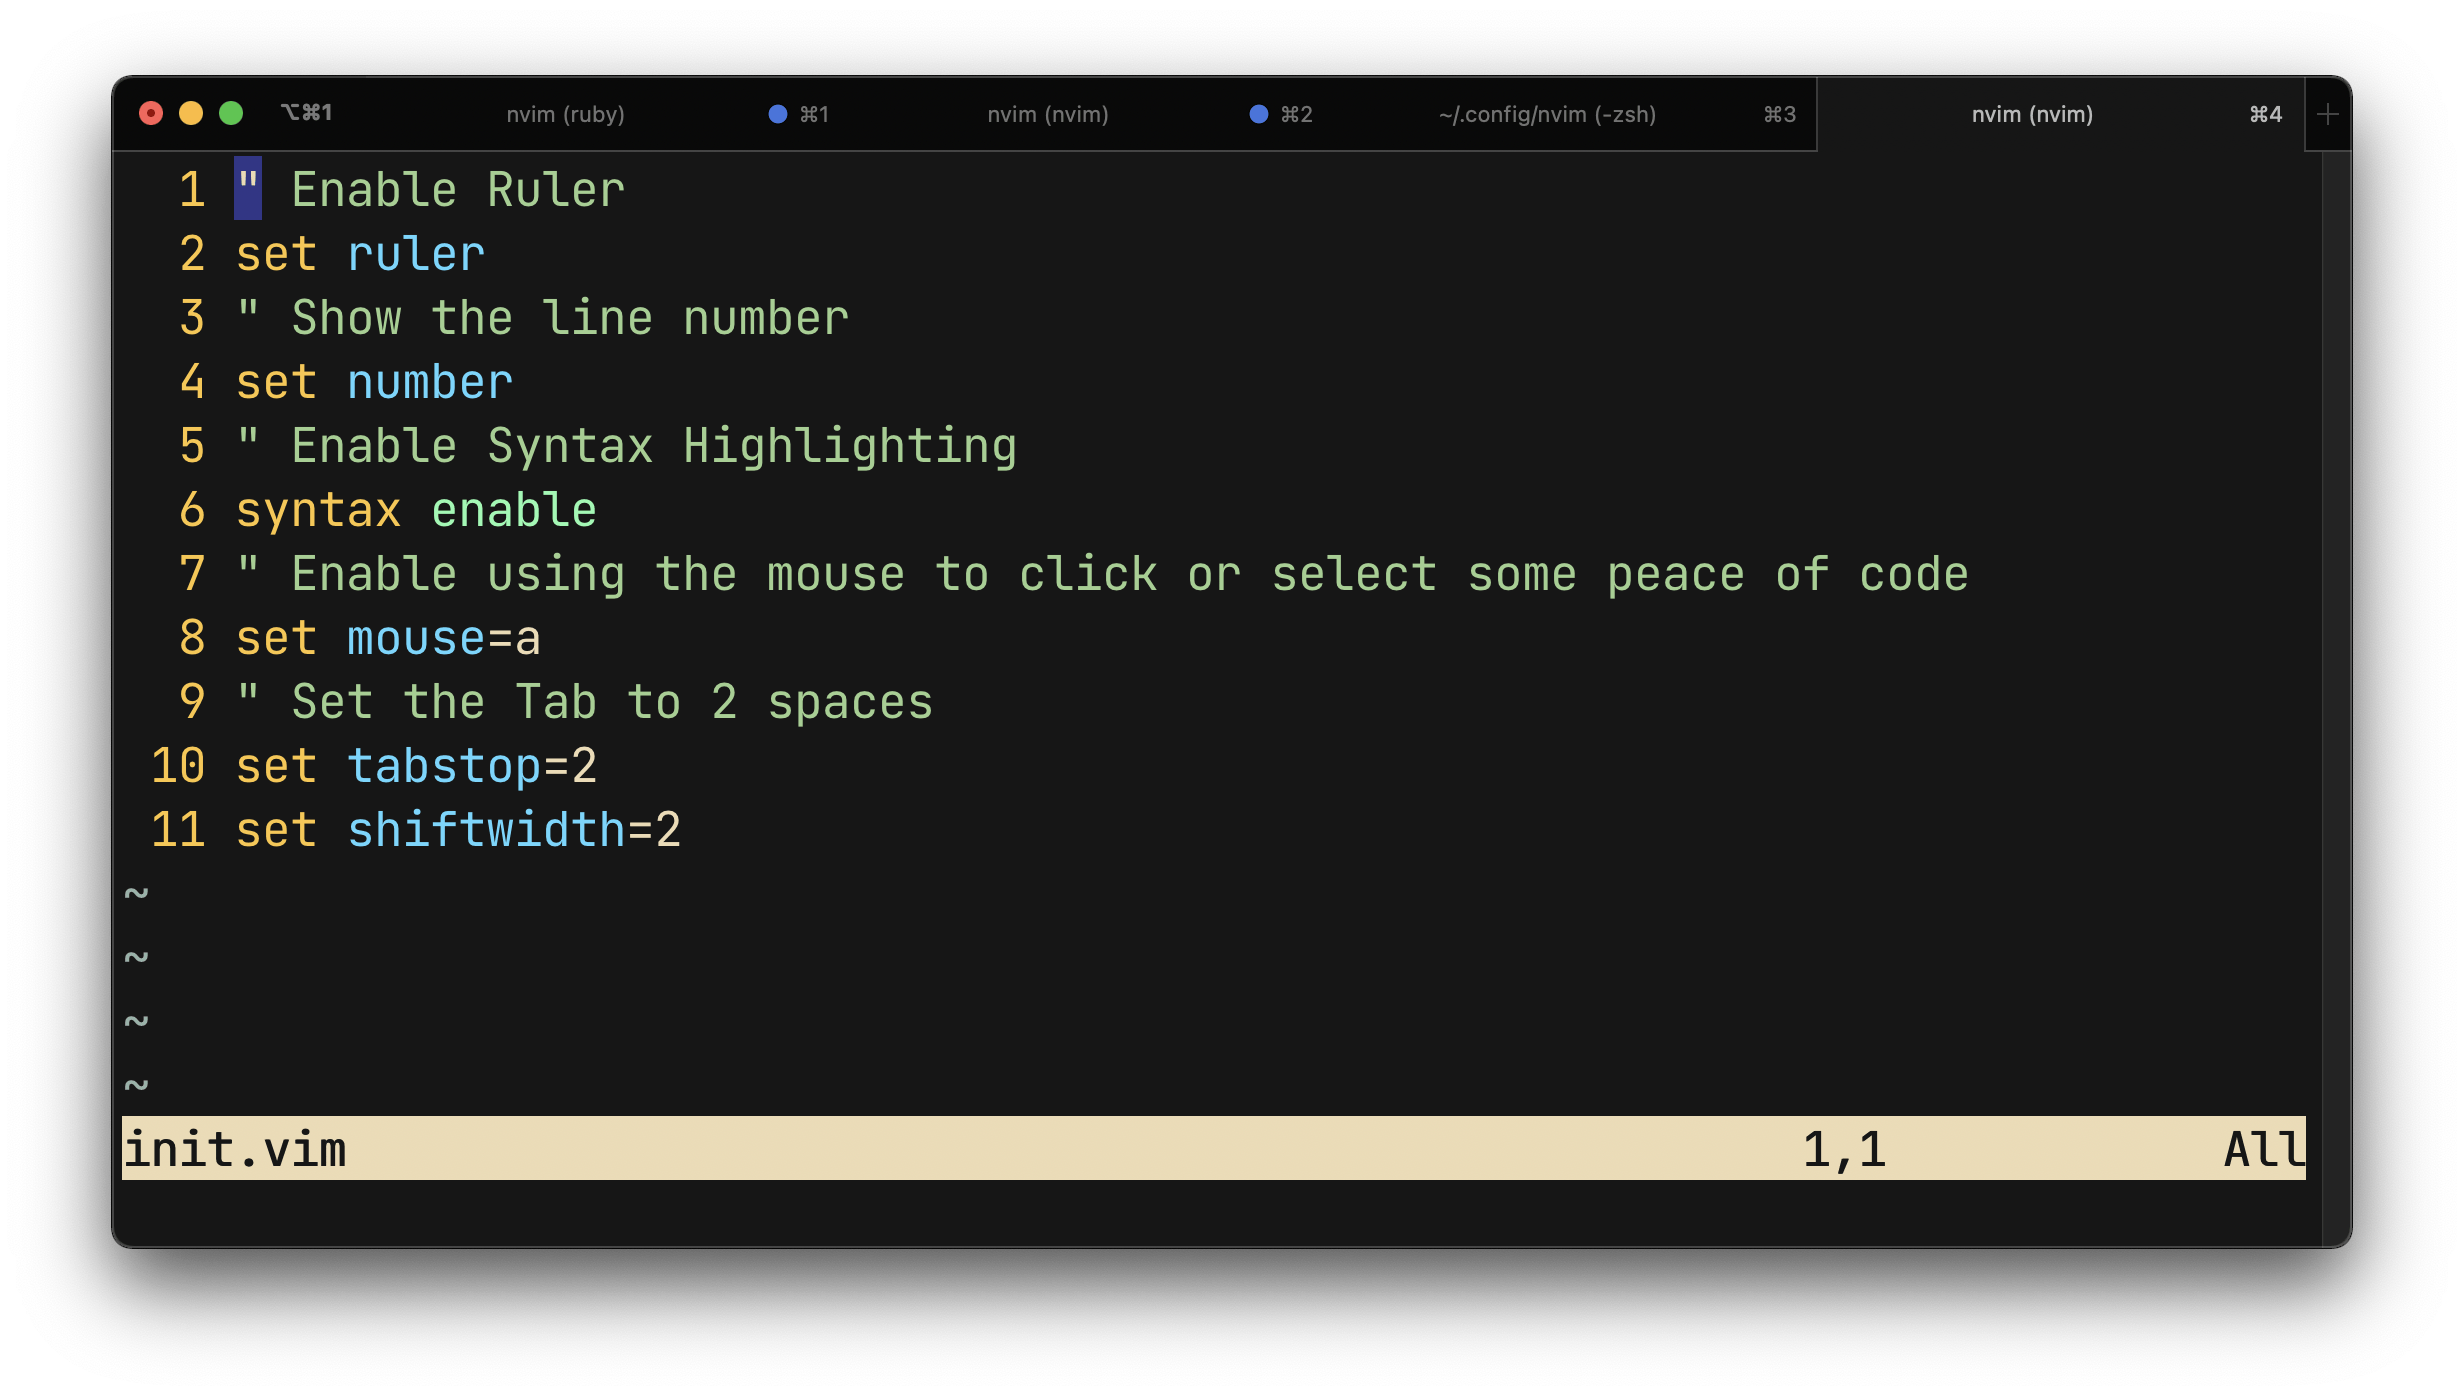
Now we can see the line numbers and you can try the TAB in INSERT mode to see if it is configured to 2 spaces and try select something using the mouse. That's it, we just defined our initial configuration.
Default Shortcuts
One of the main features of Vim/Neovim is customization, especially keyboard shortcuts to reduce mouse usage as much as possible, so in this section we will learn some default shortcuts.
Navigating
- Moving the cursor: You can use the arrow keys on your keyboard, but normally vim users use the h (⇦), j (⇩), k (⇧) and l (⇨) keys to move the cursor.
- Navigating through words: Basically you can use w to go to the next word or b to the previous word.
- Navigating through code blocks: Shift + { we move to the previous code block and Shift + } we move to the next code block.
- Navigating through lines: 0 you go to the beginning of the line and $ you go to the end of the line.
- Moving through the opened file: gg you navigate to the beginning of the file, G (capital g) you jump to the end of the file and M you navigate to the middle of the file.
Editing
- Go to the beginning of the line with INSERT mode: I (capital i).
- Go to the end of the line with INSERT mode: A (capital a).
- Open a new blank line above the cursor: O (capital o).
- Open a new blank line under the cursor: o.
- Delete the current line: dd.
- Delete the current word: diw.
- Copy a line: yy.
- Paste a line: p.
- Select intire line: Shift + v (VISUAL mode).
These are the most used by me.
Leader key and key mappings
Well, now we are going to create our first customized hotkeys, starting with our leader key. The leader key is the the main key for executing commands by merging with other keys, for example, we are going to define the "," (comma) as our leader key.
let mapleader=','
Now that we have our leader key mapped, we can map other basic commands just as an example:
- Leader+z: Executes :u (undo) like Command+z or Control+z
- Leader+Q: Executes :qa! (Force quit all) like Command+q or ALT+F4
- Leader+q: Executes :bw (Delete buffer alternative) like Command+w
nmap <leader>z :u<CR>
nmap <leader>Q :qa!<CR>
nmap <leader>q :bw<CR>
Now, we know how to map commands using the nmap function in Neovim, then we can go a step further. Plugins!
Installing Plugins
Like VSCode, Vim and Neovim have a lot of plugins created by the community for free, so we can just pick one plugin manager and start installing how many plugins we want. In this case, we are going to use Vim-Plug, one of the best plugins manager for Neovim. See the installation instructions.
With Vim-Plug installed, we can install our first plugin, however, which plugin? I think a theme could be a good choice! So, let's install Gruvbox theme.
First of all, let's recap our init.vim file so far:
" Removed comments for better viewing
set ru
set number
syntax enable
set mouse=a
set tabstop=2
set shiftwidth=2

let mapleader=','

nmap <leader>z :u<CR>
nmap <leader>Q :qa!<CR>
nmap <leader>q :bw<CR>
At the top of our init.vim file, let's add the call to our plugin manager with our first plugin, the Gruvbox theme (to install plugins, go to github and get the name of the account and the name of the repo, that simple:
" Plugins
call plug#begin()
Plug 'morhetz/gruvbox' "https://github.com/morhetz/gruvbox
call plug#end()
Close your vim and reopen to reload init.vim file and now we should be able to run :PlugInstall:

As you can see, the Gruvbox theme was installed, now we have to configure it and set as our default theme:
set termguicolors
set background=dark
colorscheme gruvbox
Close Neovim and reopen to reload init.vim file:
Looks much prettier now!
NERDTree
There are already more promising options that offer more options, but I still like to use NERDTree to see a left side file tree in my screen and manipulate my projects files, so let's add NERDTree and install it, just like we did with Gruvbox:
" Plugins
call plug#begin()
Plug 'morhetz/gruvbox' "https://github.com/morhetz/gruvbox
Plug 'preservim/nerdtree'
call plug#end()
So you don't have to close and open vim every time to reload the init.vim file, we can execute in the neovim command area:
:source ~/.config/nvim/init.vim
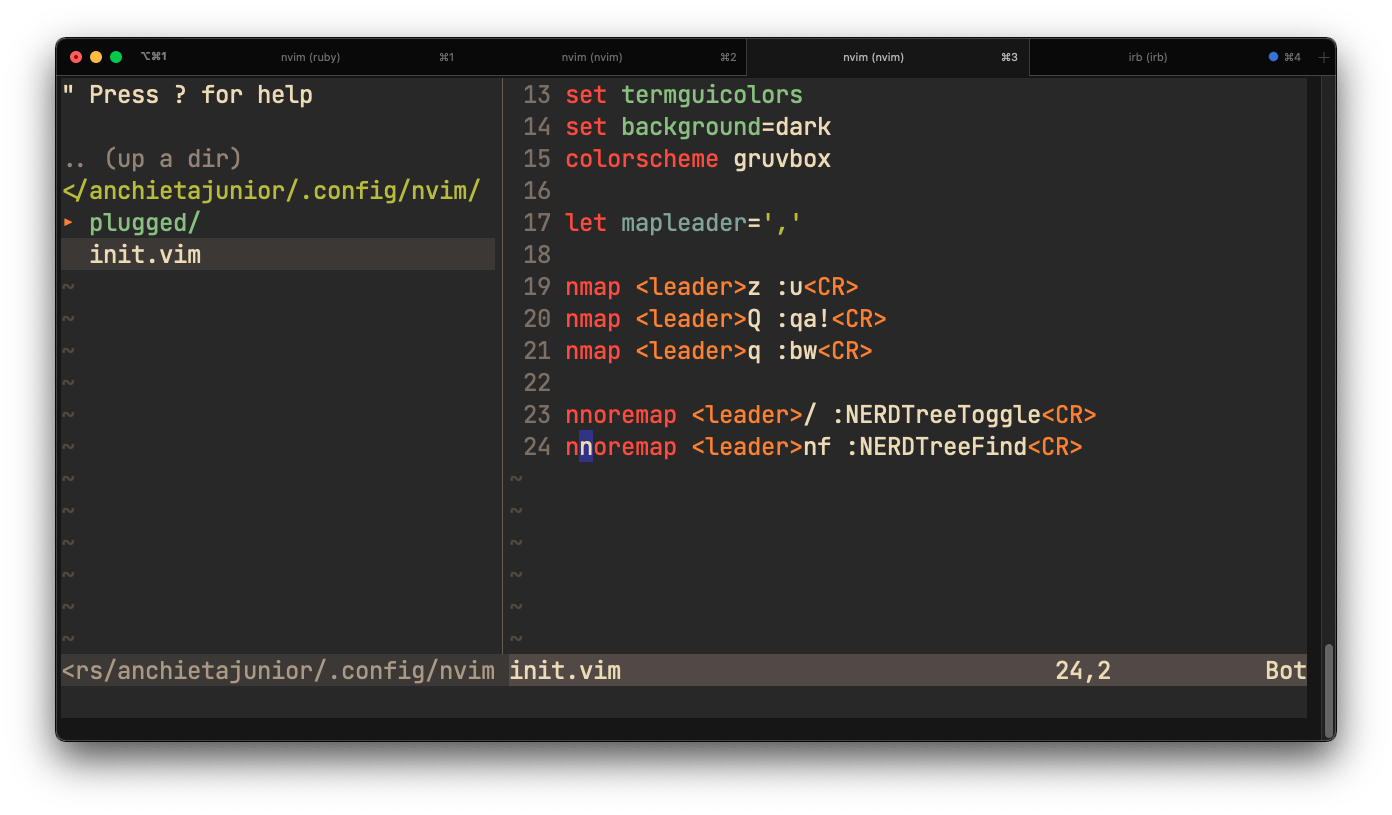
This will refresh the init.vim file in your current instance of Neovim, run it, run :PlugInstall once and let's map some other hotkeys for NERDTree:
nnoremap <leader>/ :NERDTreeToggle<CR>
nnoremap <leader>nf :NERDTreeFind<CR>
- Leader+/: Executes :NERDTreeToggle, this opens or closes the file tree depending on the current state. - Leader+nf: Executes :NERDTreeFind, so NERDTree focus in the tree file the current file you have opened in your screen.
Let's source again and execute our new hotkey:
:source ~/.config/nvim/init.vim
Now type, +/ and see the magic.
NERDTree basic usage
OBS: With NERDTree focused
- Create a new file: m + a
- Rename or move a file to another folder: m + m
- Delete a file: m + d
Icons
If you want to configure some icons for your files in your file tree, there's a good option called Vim-Devicons. Let's install this plugin:
" Plugins
call plug#begin()
Plug 'morhetz/gruvbox' "https://github.com/morhetz/gruvbox
Plug 'preservim/nerdtree'
Plug 'ryanoasis/vim-devicons'
call plug#end()
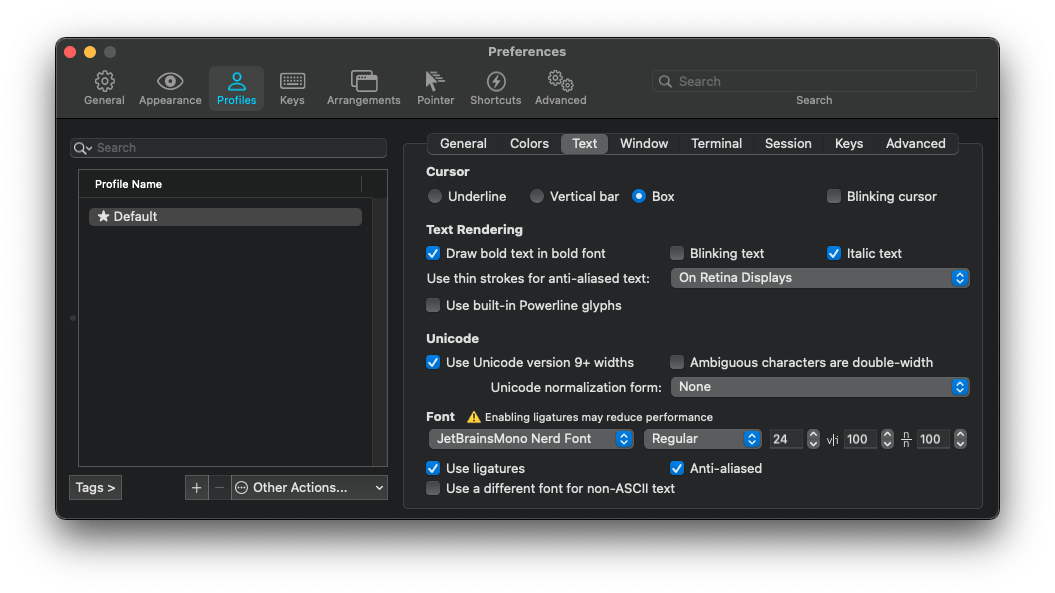
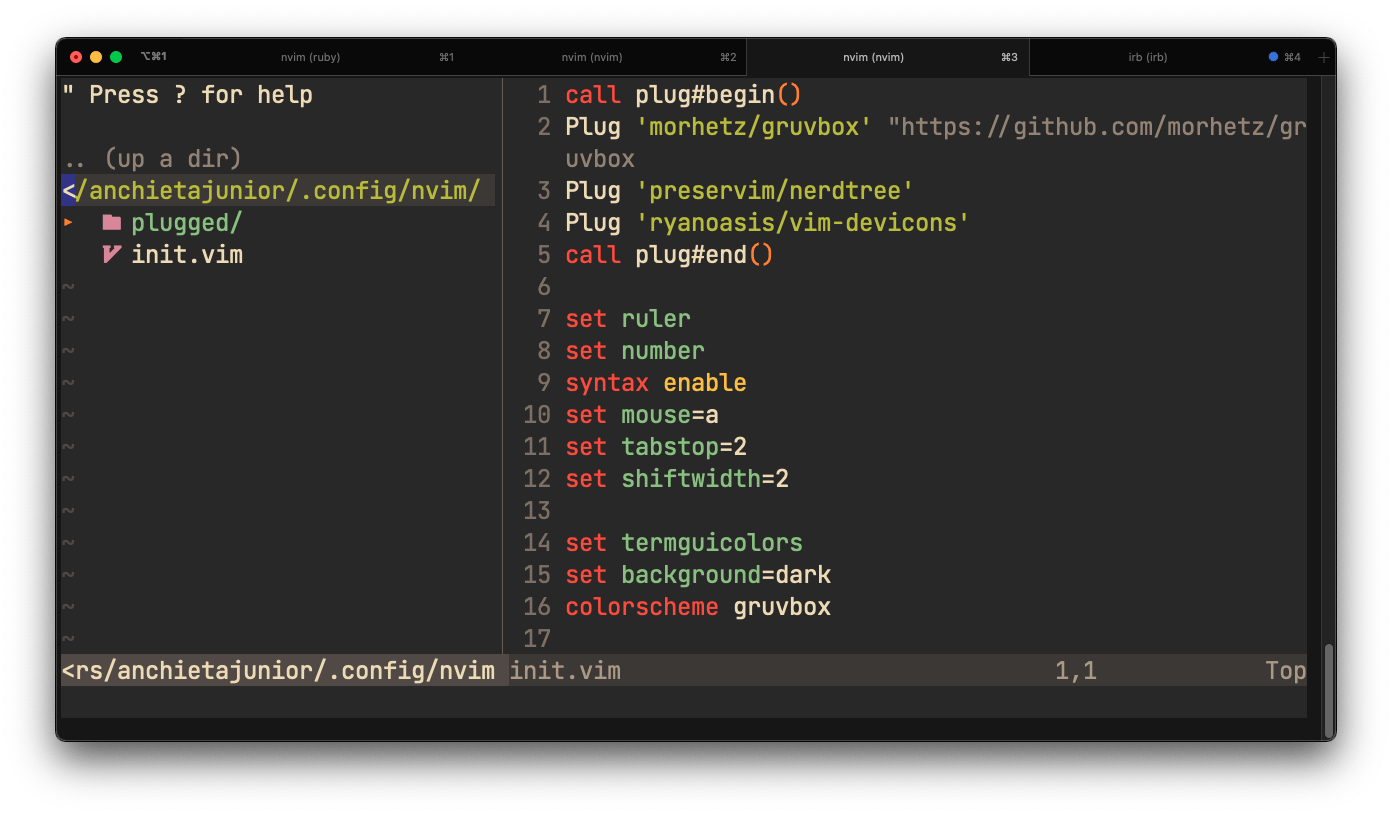
Source the init.vim file or restart vim and execute :PlugInstall. If your icons are not showing probably you'll need a NerdFont, follow the installation instructions and choose anyone you like and configure it in your terminal, in my case i use iTerm2 and i chose JetBrains Nerd Font, these are my settings:
And that's the result:
LSP Language Server Protocol
Introducing Lua scripts and other tools, LSP acts as a client to language servers and includes a Lua framework vim.lsp for building enhanced LSP tools. LSP facilitates features like:
- go-to-definition
- find-references
- hover
- completion
- rename
- format
- refactor
So, let's install LSP and some other plugins that adapt to it and further improve your experience.
" Plugins
call plug#begin()
Plug 'morhetz/gruvbox' "https://github.com/morhetz/gruvbox
Plug 'preservim/nerdtree'
Plug 'ryanoasis/vim-devicons'
Plug 'neovim/nvim-lspconfig'
Plug 'hrsh7th/nvim-compe'
Plug 'hrsh7th/vim-vsnip'
call plug#end()
Same process, source again the init.vim file or close and reopen Neovim and run :PlugInstall.
A collection of common configurations for Neovim's built-in language server client. This repo handles automatically launching and initializing language servers that are installed on your system.
This is the official description on the nvim-lspconfig page. Basically if you need a syntax checker, LSP can help you with that and other interesting things. In my case i use Solargraph to check the Ruby code I'm writing at the moment.
To make lsp and solargraph work properly, I need to install solargraph on my machine and then do some basic lsp settings using the lua language:
# With Ruby installed (rvm, rbenv, asdf or any other way)
gem install solargraph
Now let's add some Lua Script to our init.vim file. Note that to write Lua code inside the init.vim file we need to indicate before and after the script that we are running a Lua script via the EOF command:
lua << EOF
require'lspconfig'.solargraph.setup{}

local nvim_lsp = require('lspconfig')

-- Use an on_attach function to only map the following keys
-- after the language server attaches to the current buffer
local on_attach = function(client, bufnr)
  local function buf_set_keymap(...) vim.api.nvim_buf_set_keymap(bufnr, ...) end
  local function buf_set_option(...) vim.api.nvim_buf_set_option(bufnr, ...) end

  --Enable completion triggered by <c-x><c-o>
  buf_set_option('omnifunc', 'v:lua.vim.lsp.omnifunc')

  -- Mappings.
  local opts = { noremap=true, silent=true }

  -- See `:help vim.lsp.*` for documentation on any of the below functions
  buf_set_keymap('n', 'gD', '<Cmd>lua vim.lsp.buf.declaration()<CR>', opts)
  buf_set_keymap('n', 'gd', '<Cmd>lua vim.lsp.buf.definition()<CR>', opts)
  buf_set_keymap('n', 'K', '<Cmd>lua vim.lsp.buf.hover()<CR>', opts)
  buf_set_keymap('n', 'gi', '<cmd>lua vim.lsp.buf.implementation()<CR>', opts)
  buf_set_keymap('n', '<C-k>', '<cmd>lua vim.lsp.buf.signature_help()<CR>', opts)
  buf_set_keymap('n', '<space>wa', '<cmd>lua vim.lsp.buf.add_workspace_folder()<CR>', opts)
  buf_set_keymap('n', '<space>wr', '<cmd>lua vim.lsp.buf.remove_workspace_folder()<CR>', opts)
  buf_set_keymap('n', '<space>wl', '<cmd>lua print(vim.inspect(vim.lsp.buf.list_workspace_folders()))<CR>', opts)
  buf_set_keymap('n', '<space>D', '<cmd>lua vim.lsp.buf.type_definition()<CR>', opts)
  buf_set_keymap('n', '<space>rn', '<cmd>lua vim.lsp.buf.rename()<CR>', opts)
  buf_set_keymap('n', '<space>ca', '<cmd>lua vim.lsp.buf.code_action()<CR>', opts)
  buf_set_keymap('n', 'gr', '<cmd>lua vim.lsp.buf.references()<CR>', opts)
  buf_set_keymap('n', '<space>e', '<cmd>lua vim.lsp.diagnostic.show_line_diagnostics()<CR>', opts)
  buf_set_keymap('n', '[d', '<cmd>lua vim.lsp.diagnostic.goto_prev()<CR>', opts)
  buf_set_keymap('n', ']d', '<cmd>lua vim.lsp.diagnostic.goto_next()<CR>', opts)
  buf_set_keymap('n', '<space>q', '<cmd>lua vim.lsp.diagnostic.set_loclist()<CR>', opts)
  buf_set_keymap("n", "<space>f", "<cmd>lua vim.lsp.buf.formatting()<CR>", opts)

end

-- Use a loop to conveniently call 'setup' on multiple servers and
-- map buffer local keybindings when the language server attaches
local servers = { "solargraph" }
for _, lsp in ipairs(servers) do
  nvim_lsp[lsp].setup {
    on_attach = on_attach,
    flags = {
      debounce_text_changes = 150,
    }
}
end
EOF
That's a lot of things happening here, I advise you to look at the lsp documentation.
Now we have another plugin installed called nvim-compe that help us with completion when we are writing our code, this plugin also has some configurations needed, so let's add to our init.vim file:
lua << EOF
vim.o.completeopt = "menuone,noselect"

require'compe'.setup {
  enabled = true;
  autocomplete = true;
  debug = false;
  min_length = 1;
  preselect = 'enable';
  throttle_time = 80;
  source_timeout = 200;
  incomplete_delay = 400;
  max_abbr_width = 100;
  max_kind_width = 100;
  max_menu_width = 100;
  documentation = false;

  source = {
    path = true;
    buffer = true;
    calc = true;
    vsnip = true;
    nvim_lsp = true;
    nvim_lua = true;
    spell = true;
    tags = true;
    snippets_nvim = true;
    treesitter = true;
  };
}
local t = function(str)
  return vim.api.nvim_replace_termcodes(str, true, true, true)
end

local check_back_space = function()
    local col = vim.fn.col('.') - 1
    if col == 0 or vim.fn.getline('.'):sub(col, col):match('%s') then
        return true
    else
        return false
    end
end

-- Use (s-)tab to:
--- move to prev/next item in completion menuone
--- jump to prev/next snippet's placeholder
_G.tab_complete = function()
  if vim.fn.pumvisible() == 1 then
    return t "<C-n>"
  elseif vim.fn.call("vsnip#available", {1}) == 1 then
    return t "<Plug>(vsnip-expand-or-jump)"
  elseif check_back_space() then
    return t "<Tab>"
  else
    return vim.fn['compe#complete']()
  end
end
_G.s_tab_complete = function()
  if vim.fn.pumvisible() == 1 then
    return t "<C-p>"
  elseif vim.fn.call("vsnip#jumpable", {-1}) == 1 then
    return t "<Plug>(vsnip-jump-prev)"
  else
    -- If <S-Tab> is not working in your terminal, change it to <C-h>
    return t "<S-Tab>"
  end
end

vim.api.nvim_set_keymap("i", "<Tab>", "v:lua.tab_complete()", {expr = true})
vim.api.nvim_set_keymap("s", "<Tab>", "v:lua.tab_complete()", {expr = true})
vim.api.nvim_set_keymap("i", "<S-Tab>", "v:lua.s_tab_complete()", {expr = true})
vim.api.nvim_set_keymap("s", "<S-Tab>", "v:lua.s_tab_complete()", {expr = true})
EOF
Wow! That's a lot of things and i couldn't explain everything here (I don't know everything either) but look, now we have tips related to our Ruby code, so take a look at nvim-compe documentation and let's go ahead.
If you use Rubocop like me, you can configure it to run along with solargraph, just like in VSCode.
Telescope
Telescope is the tool that made back to Neovim once for all. When we work in a project with thousands of files, you need a fuzzy finder and a file browser to improve your work, Telescope give us these two finds and more, so let's install it and test:
" Plugins call plug#begin() Plug 'morhetz/gruvbox' "github.com/morhetz/gruvbox Plug 'preservim/nerdtree' Plug 'ryanoasis/vim-devicons' Plug 'neovim/nvim-lspconfig' Plug 'hrsh7th/nvim-compe' Plug 'hrsh7th/vim-vsnip' Plug 'nvim-lua/popup.nvim' Plug 'nvim-lua/plenary.nvim' Plug 'nvim-telescope/telescope.nvim' call plug#end()
Telescope needs other two plugins to run correctly (popum.nvim and plenary.nvim). Remember to source init.vim file again or close and open Neovim and let's define some new hotkeys for Telescope:

```vim
nnoremap <leader>ff <cmd>Telescope find_files<CR>
nnoremap <leader>fg <cmd>Telescope live_grep<cr>
Leader + ff you browse files by name and Leader + fg you search files by their content:
As you can see, Telescope provides a preview of the files.
Other Plugins
Now I'm leaving here other good options to install and improve your work, principally if you work with Ruby and Rails.
- Plug 'thoughtbot/vim-rspec'
- Plug 'tpope/vim-rails'
- Plug 'tpope/vim-endwise'
That's it! Hope you enjoy this post and give Neovim, LSP and Telescope a chance for you to be Happy and productive. :D
This is the result of our init.vim file, if you want to see more configurations, take a look at my current configurations.
call plug#begin()
Plug 'morhetz/gruvbox' "https://github.com/morhetz/gruvbox
Plug 'preservim/nerdtree'
Plug 'ryanoasis/vim-devicons'
Plug 'neovim/nvim-lspconfig'
Plug 'hrsh7th/nvim-compe'
Plug 'hrsh7th/vim-vsnip'
Plug 'nvim-lua/popup.nvim'
Plug 'nvim-lua/plenary.nvim'
Plug 'nvim-telescope/telescope.nvim'
call plug#end()

set ruler
set number
syntax enable
set mouse=a
set tabstop=2
set shiftwidth=2

set termguicolors
set background=dark
colorscheme gruvbox

let mapleader=','

nmap <leader>z :u<CR>
nmap <leader>Q :qa!<CR>
nmap <leader>q :bw<CR>

nnoremap <leader>/ :NERDTreeToggle<CR>
nnoremap <leader>nf :NERDTreeFind<CR>

lua << EOF
local nvim_lsp = require('lspconfig')

-- Use an on_attach function to only map the following keys
-- after the language server attaches to the current buffer
local on_attach = function(client, bufnr)
  local function buf_set_keymap(...) vim.api.nvim_buf_set_keymap(bufnr, ...) end
  local function buf_set_option(...) vim.api.nvim_buf_set_option(bufnr, ...) end

  --Enable completion triggered by <c-x><c-o>
  buf_set_option('omnifunc', 'v:lua.vim.lsp.omnifunc')

  -- Mappings.
  local opts = { noremap=true, silent=true }

  -- See `:help vim.lsp.*` for documentation on any of the below functions
  buf_set_keymap('n', 'gD', '<Cmd>lua vim.lsp.buf.declaration()<CR>', opts)
  buf_set_keymap('n', 'gd', '<Cmd>lua vim.lsp.buf.definition()<CR>', opts)
  buf_set_keymap('n', 'K', '<Cmd>lua vim.lsp.buf.hover()<CR>', opts)
  buf_set_keymap('n', 'gi', '<cmd>lua vim.lsp.buf.implementation()<CR>', opts)
  buf_set_keymap('n', '<C-k>', '<cmd>lua vim.lsp.buf.signature_help()<CR>', opts)
  buf_set_keymap('n', '<space>wa', '<cmd>lua vim.lsp.buf.add_workspace_folder()<CR>', opts)
  buf_set_keymap('n', '<space>wr', '<cmd>lua vim.lsp.buf.remove_workspace_folder()<CR>', opts)
  buf_set_keymap('n', '<space>wl', '<cmd>lua print(vim.inspect(vim.lsp.buf.list_workspace_folders()))<CR>', opts)
  buf_set_keymap('n', '<space>D', '<cmd>lua vim.lsp.buf.type_definition()<CR>', opts)
  buf_set_keymap('n', '<space>rn', '<cmd>lua vim.lsp.buf.rename()<CR>', opts)
  buf_set_keymap('n', '<space>ca', '<cmd>lua vim.lsp.buf.code_action()<CR>', opts)
  buf_set_keymap('n', 'gr', '<cmd>lua vim.lsp.buf.references()<CR>', opts)
  buf_set_keymap('n', '<space>e', '<cmd>lua vim.lsp.diagnostic.show_line_diagnostics()<CR>', opts)
  buf_set_keymap('n', '[d', '<cmd>lua vim.lsp.diagnostic.goto_prev()<CR>', opts)
  buf_set_keymap('n', ']d', '<cmd>lua vim.lsp.diagnostic.goto_next()<CR>', opts)
  buf_set_keymap('n', '<space>q', '<cmd>lua vim.lsp.diagnostic.set_loclist()<CR>', opts)
  buf_set_keymap("n", "<space>f", "<cmd>lua vim.lsp.buf.formatting()<CR>", opts)

end

-- Use a loop to conveniently call 'setup' on multiple servers and
-- map buffer local keybindings when the language server attaches
local servers = { "solargraph" }
for _, lsp in ipairs(servers) do
  nvim_lsp[lsp].setup {
    on_attach = on_attach,
    flags = {
      debounce_text_changes = 150,
    }
}
end
EOF

lua << EOF
vim.o.completeopt = "menuone,noselect"

require'compe'.setup {
  enabled = true;
  autocomplete = true;
  debug = false;
  min_length = 1;
  preselect = 'enable';
  throttle_time = 80;
  source_timeout = 200;
  incomplete_delay = 400;
  max_abbr_width = 100;
  max_kind_width = 100;
  max_menu_width = 100;
  documentation = false;

  source = {
    path = true;
    buffer = true;
    calc = true;
    vsnip = true;
    nvim_lsp = true;
    nvim_lua = true;
    spell = true;
    tags = true;
    snippets_nvim = true;
    treesitter = true;
  };
}
local t = function(str)
  return vim.api.nvim_replace_termcodes(str, true, true, true)
end

local check_back_space = function()
    local col = vim.fn.col('.') - 1
    if col == 0 or vim.fn.getline('.'):sub(col, col):match('%s') then
        return true
    else
        return false
    end
end

-- Use (s-)tab to:
--- move to prev/next item in completion menuone
--- jump to prev/next snippet's placeholder
_G.tab_complete = function()
  if vim.fn.pumvisible() == 1 then
    return t "<C-n>"
  elseif vim.fn.call("vsnip#available", {1}) == 1 then
    return t "<Plug>(vsnip-expand-or-jump)"
  elseif check_back_space() then
    return t "<Tab>"
  else
    return vim.fn['compe#complete']()
  end
end
_G.s_tab_complete = function()
  if vim.fn.pumvisible() == 1 then
    return t "<C-p>"
  elseif vim.fn.call("vsnip#jumpable", {-1}) == 1 then
    return t "<Plug>(vsnip-jump-prev)"
  else
    -- If <S-Tab> is not working in your terminal, change it to <C-h>
    return t "<S-Tab>"
  end
end

vim.api.nvim_set_keymap("i", "<Tab>", "v:lua.tab_complete()", {expr = true})
vim.api.nvim_set_keymap("s", "<Tab>", "v:lua.tab_complete()", {expr = true})
vim.api.nvim_set_keymap("i", "<S-Tab>", "v:lua.s_tab_complete()", {expr = true})
vim.api.nvim_set_keymap("s", "<S-Tab>", "v:lua.s_tab_complete()", {expr = true})
EOF

nnoremap <leader>ff <cmd>Telescope find_files<CR>
nnoremap <leader>fg <cmd>Telescope live_grep<cr>